Tuesday, June 2, 2015

H600 quadcopter an alternative build to F550 hexacopter

I have been thinking of building a 3rd multi rotor frame.  The purpose of it is a better aerial photography (AP) platform than my stock F450.  Primarily I wanted my video to have no propeller in view.  My options are to heavily modify my F450 with extended arms, bigger motors, etc.  Or build a hexacopter like the F550 which would need a long camera positioning pole to have a video free of the propellers. Another good alternative is the QAV550 and Cinetank frames, which both are a bit expensive for my budget.  I wanted off the shelf parts to keep it simple for me, as I just started on this hobby less than a year only.  Also maybe this build can be followed by someone new to the hobby as well.

Luckily I saw a frame sold as Super H600 Quadcopter at HobbyKing that may be good enough for my needs.  It's not the best, but what appealed to me is the use of the F450 arms.  I had spare parts of the F450 and I also had a V550 which is really a F450 frame with a different layout.  Below is the maiden flight with is pretty much using stock components and my spare motors and props.


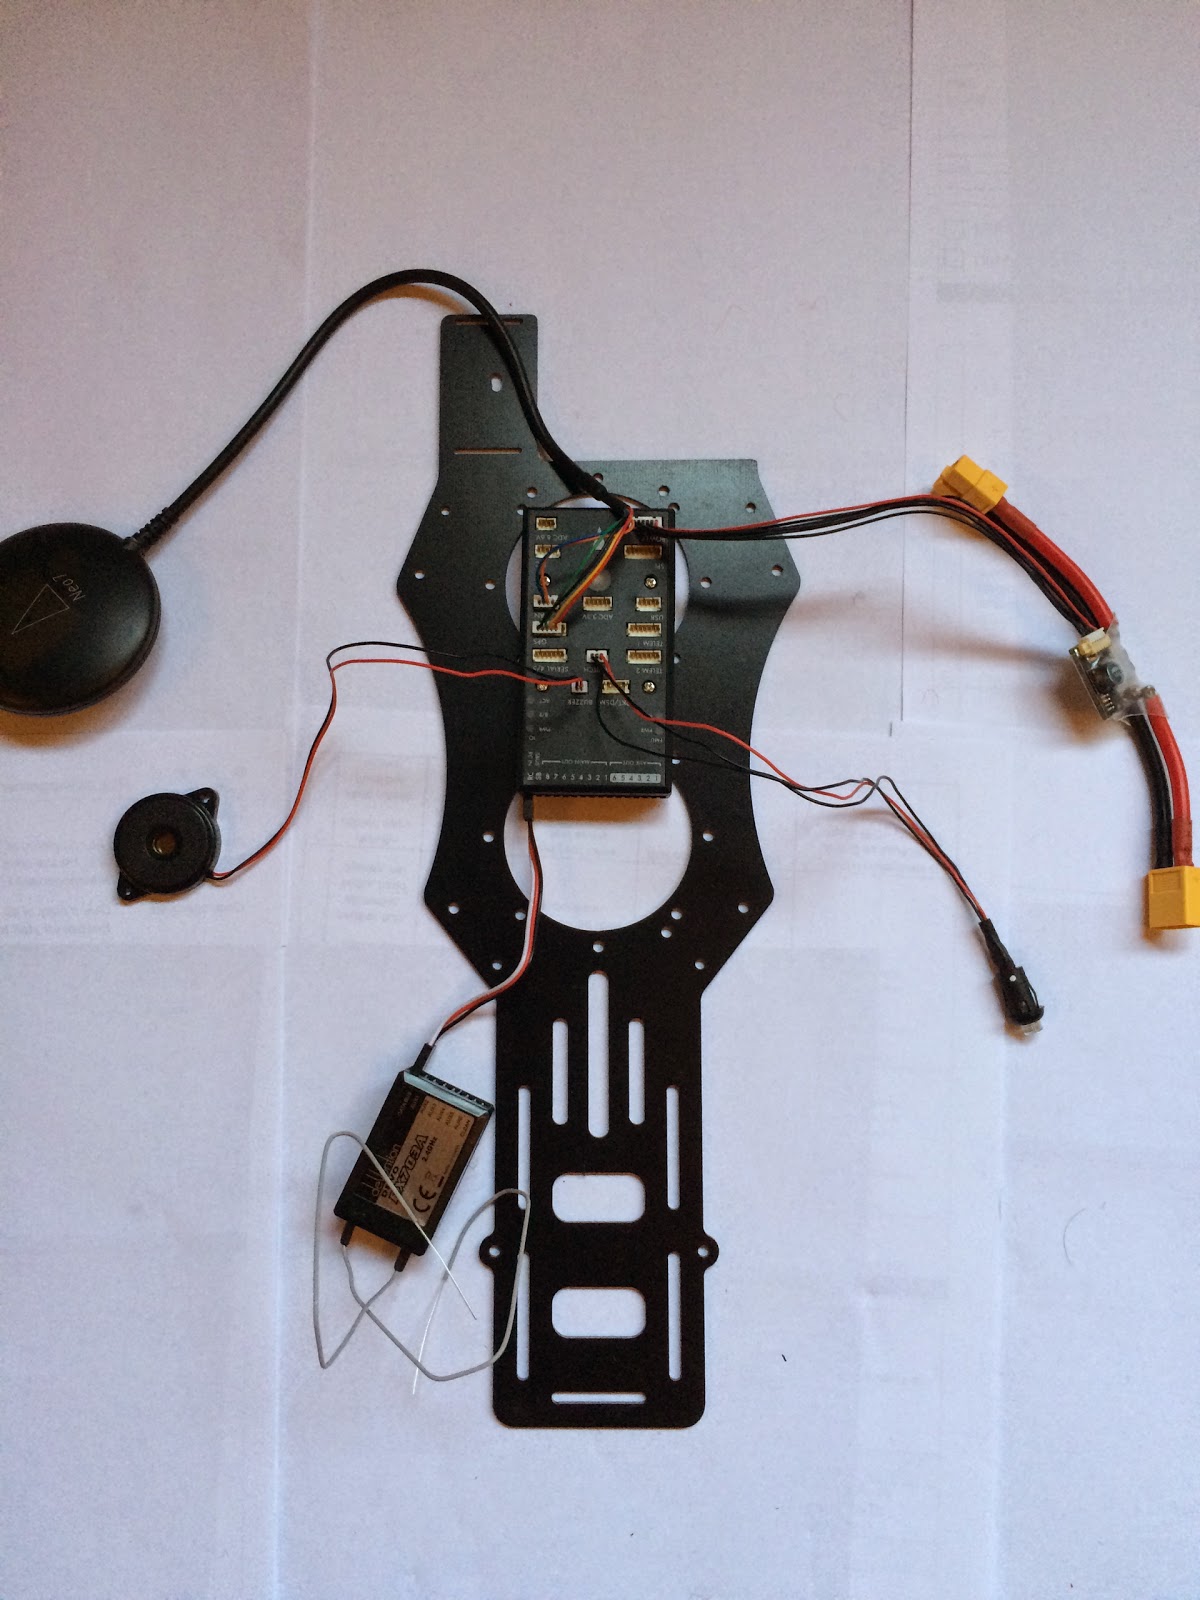
I started with H600 frame, my spare/test parts 2212 Multistar motors, 1038 Gemfan props and Tmotor Air 20a ESC.  The flight controller (FC) is the HK Pilot APM micro, which I bought as a set, which included GPS, OSD, telemetry radio.

The basic frame was definitely bigger which is great as it's not cramped as the F450, however it's also heavier.  I then thought that it will not be possible to use just the same 2212 motors as the F450.  I decided to buy some extended arms, this was I can go with much bigger propellers for more thrust. I decided to put an extended upswept arms from Diatone. I was thinking the quad is pretty much a H-frame so the upswept geometry should only affect the roll and not much of the pitch.  On my first flight to test the extended arms I decided to also test the high wind performance of the build. The test went well, it flew well despite the high wind and underpowered motors. Unfortunately on my last segment of the flight while bringing it for a landing I did a roll and a gust of wind flipped it. I suffered my first real crash since I started on the hobby.


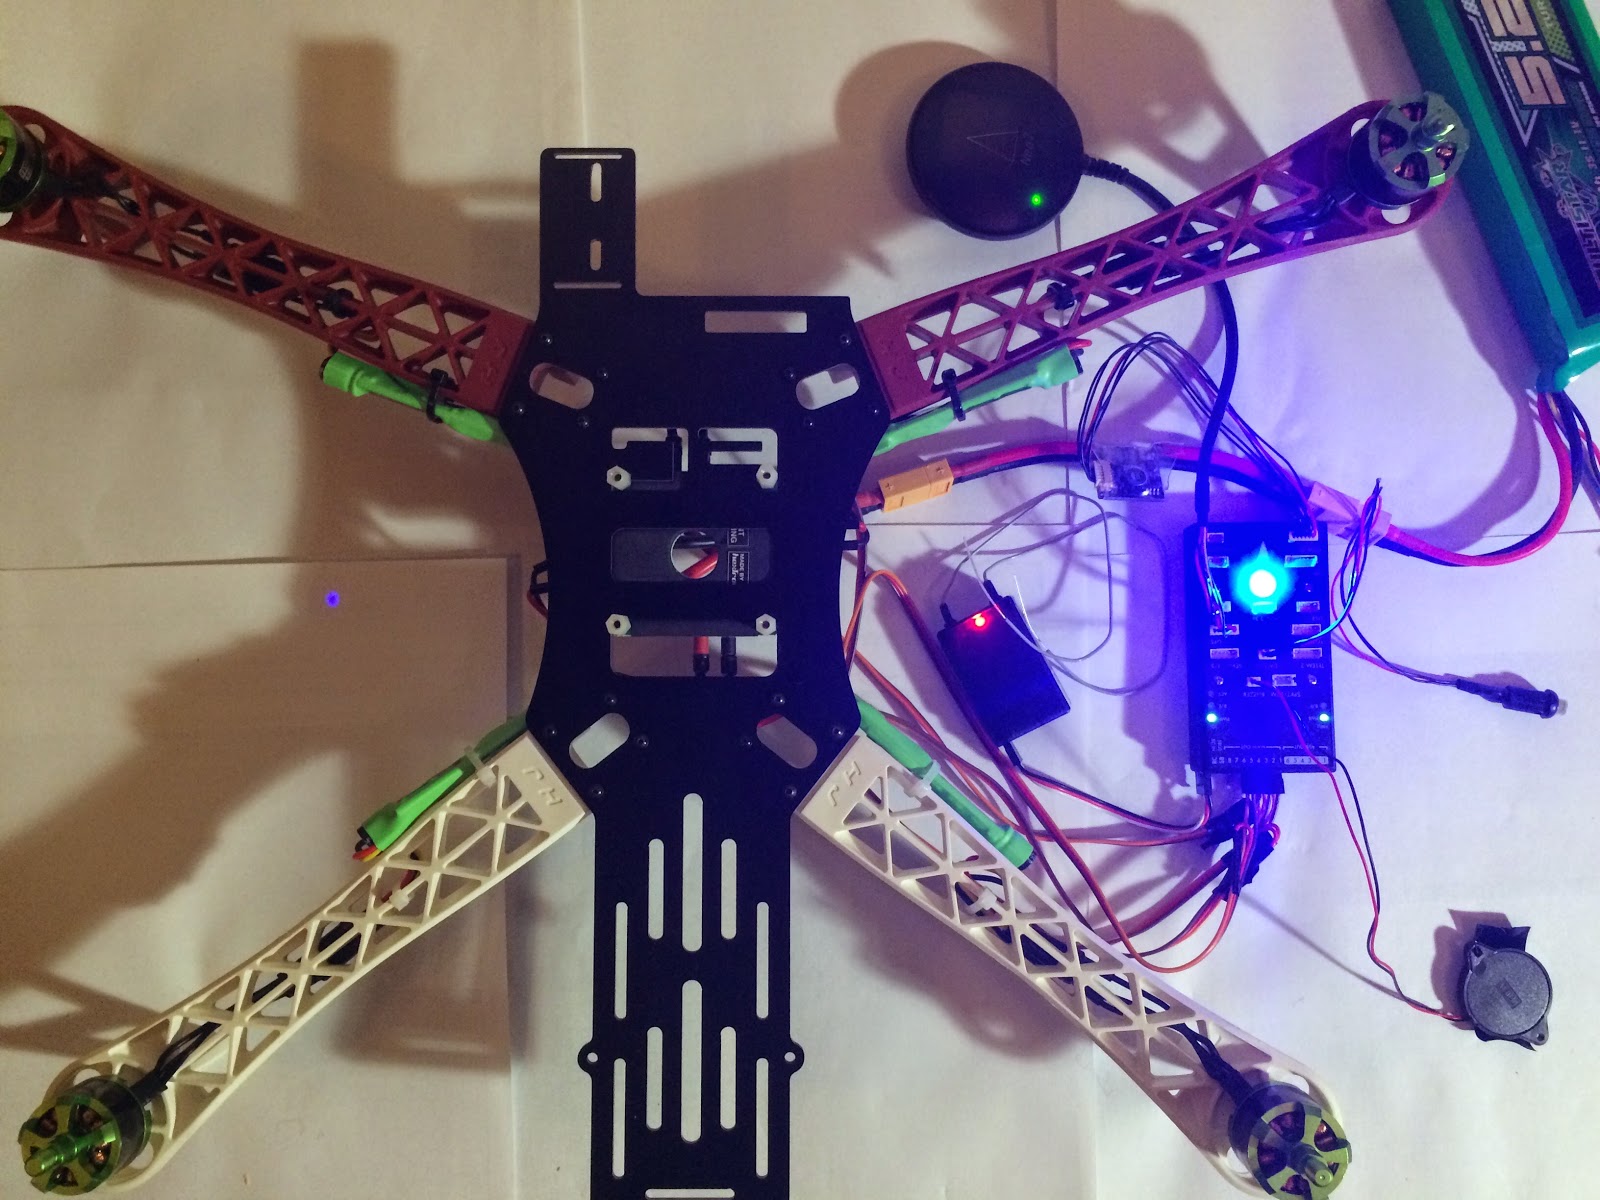
I decided to buy another H600 frame and do a rebuild. On the rebuild I added 4 more standoffs (2 on each side) on the bottom frame, close to where the weak point is. Below you can see on the side the 2 additional standoffs. I also added the old broken bottom plate on the build, to make a double plate. Since the 2212 and 2213 does not have enough to thrust to lift the frame well. I went for a 4006 740kv motors, to keep the budget low I went for the Multistar Elites. I then coupled it with APC 1245 propellers. The 740kv motors allowed me to keep my existing 3S batteries and ESC. I did not went for the super low KV motors as that would require me to buy new ESC instead of using my spares and series my 3S battery or buy 6S. With this setup a AUW 2kg (3 axis gimbal, fpv, osd included) has about 8 to 12 mins flight time.


I added some functional bling to the frame, LED lights. This helped me a bit for LOS flying or my spotter to track it.


I think the build went pretty well, below is the video that I was able to take with the H600.  This is literally the 1st and 2nd flight outside of test flights.


Some more build notes for my reference.

On my Walkera Devo 10 to have 6 flight modes I have done the following:
Travel Adjust Gear
+83.0%
-100.0%
Subtrim Gear: -30.0%

Program Mix 1
Master: Flap
Slave: Gear
Pos 0 Up: +65%

Device Output
Gear: Mix SW
Flaw: Gear SW


  • Channel 5 for lost model alarm
  • Setup failsafe gear +100% which would put it into RTL flight mode
  • Use fixed ID for quick recovery of signal
  • Reverse Elevator, Aileron and Rudder channels
  • Gimbal on aux 4, travel adjust 65% 65%


Setup of APM micro 2.7

  • Firmware Arducopter 3.2.1
  • Frame type H
  • APM with external compass (needed to cut the link on the board)
  • radio calibration.
  • COMPASS_ORIENT = 12 (gps pointing backwards, MAYBE WRONG NEED TO CHECK)
  • PILOT_VELZ_MAX = 350 make it move faster
  • THR_DZ = 50 drop dead zone
  • extended tuning


I covered the barometer, with makeup foam.  This way the reading with not be erratic because of propeller wash and sunlight.

Thursday, April 30, 2015

Built a cheap quadcopter, then fly it to places where it may never return

I had this post on draft edit for a long time, never gotten to finish it as I was too busy having fun flying the V550.  This cheap quad turned out to be a great one to use, and it was flown it on flights where a mistake would mean it will never return.

I am not advocating to buy the cheapest components, however it's possible to selectively purchase components and still come up with a quadcopter that does not cost a fortune without sacrificing performance.


Here is my basic setup:
  • Reptile V550 frame (TBS Discovery clone)
  • HK Pilot32 (Pixhawk clone)
  • T-motor air gear 350 set consist of: T-motor 2213 motor, 9545 propellers and air 20A esc
  • 1 axis gimbal using Alex Mos board
I have flipped my HK Pilot32 so that I can see the LED when its flying, set AHRS_ORIENTATION  to 8.  My GPS puck is rotated 180, so COMPASS_ORIENT is set to 4.

On my Walkera Devo 10 to have 6 flight modes on channel 5 I have done the following:

Travel Adjust Gear
+83.0%
-100.0%
Subtrim Gear:
-30.0%

Program Mix 1
Master: Flap
Slave: Gear
Pos 0 Up: +65%

Device Output
Gear: Mix SW
Flap: Gear SW

For PID settings I used autotune start, it flew really well.  I then turned down a bit so it would be smoother for aerial videos


For althold I reduced the trim dead spot on alt hold from 10% to 5% setting THR_DZ to 50
Increased max vertical parameter from 2.5 cm/s to 3.5cm/s setting PILOT_VELZ_MAX to 350

I have installed minimOSD 1.1 on it using Minim OSD Extra 2.3.2.0 CT tool flashing in 2.4 r726 hex file.

Installed a 3 in 1 battery monitor, lost model alarm and used Aux 5

Some flights done by the V550


Previous steps of the build:

Tuesday, October 28, 2014

Building a cheap quad. Step 5: Expect things to fail and not go as planned

Since this is a cheap frame, I should have thought not all screws will be provided. It did not have any screws for the motor, luckily I had 8 spare... but I needed 16. I went to 2 hardware store and 1 auto store, none of them has a M3 that is 6mm short. I am glad my neighbour has heaps of RC parts, as he used to own a hobby shop and still has a few planes of his own.

The Pixhawk FC is a open source hardware and software platform. Much like Linux before, there are lots of loose documentation. I almost bricked my FC after 2 failed firmware updates. Also did not realise there are 2 different firmware for it.

I have got also some failed parts, which I did not order extra parts on. 1 of the ESC has failed, must be dud... or I smoked it after a few mins. Wrong firmware on the FC perhaps. The safety switch LED also does not work.

Anyway ordered the failed parts and I need to start reading more about the Pixhawk.. maybe next week things will all work and go as planned.

Building a cheap quad. Step 4: Put together the top and bottom plates of the Reptile V550

After a lot of trial and error, hand gymnastics... surprisingly all the electronic parts fit when I sandwich the top and bottom plates together. This is not a kit, no instructions and I had no idea everything will fit.

The bottom plate main consist of the flight controller, receiver. While the toplate has the power distribution board, gimbal board. As you can see on the photos the flight controller has only a few mm to room to spare.


Building a cheap quad. Step 3: Setup the HK Pilot32 (Pixhawk clone) Flight Controller (FC)

I always wanted to have a Pixhawk FC, but I am on a budget. So a clone of it, the HK Pilot32 will do
I did not realise there where a few choices for ground station software and firmware. I initially used qgroundcontrol and flashed the firmware. The 1st flash failed, gladly a 2nd flash worked. I went through some calibration steps, some of the documentation is a bit outdated. To matters worse I did not realise that there are different ground station software and firmware, so doing a google on pixhawk may give you links to different ones. Example there are a slight variation from the qgroundcontrol and APM mission planner buzzer/beep codes.

My safety switch LED light also is not working.


Building a cheap quad. Step 2: Wire in Motors and Electronic Speed Control (ESC)

I screwed on the motors, being a cheap frame it does not come with screws. You will need an extra 16pcs of M3x6mm. Luckily I had some spares, but only 12 pcs. For now I only have 3 screws per motor. While I was busy using zip ties for the cables, my daughter was also busy using zip ties for some art. I had to also move the PDB lower, as my ESC cables on the rear is too short.

Building a cheap quad. Step 1: Mount the power distribution board (PDB) to the Reptile V550 (v2) frame

The Reptile V550 (v2) is a cheap frame, so it does not have any instructions. Luckily the PDB just fits enough the top frame after a few trial and error of using different screws and mounts. I used a M3 screw and a nut, I also eventually lowered it a bit later from this photo to accommodate the gimbal board.

Also pictured here is side by side comparison with my current DJI F450 arms. The cheaper one is not as white and narrower, it seems to be just as stiff though.